Recipe by Silvia Baldini — Indulge in this Italian classic, perfect for a midafternoon snack or breakfast. This Soft Almond and Lemon Ricotta Cake marries the rich, soft creaminess of ricotta cheese with the irresistible flavors of almond and lemon. Best part, it's naturally gluten-free, thanks to the exclusive use of almond flour. Enjoy.
Recipe by Silvia Baldini — Indulge in this Italian classic, perfect for a midafternoon snack or breakfast. This Soft Almond and Lemon Ricotta Cake marries the rich, soft creaminess of ricotta cheese with the irresistible flavors of almond and lemon. Best part, it's naturally gluten-free, thanks to the exclusive use of almond flour. Enjoy.
Preheat your oven to 350°F Grease a 9-inch (23cm) springform pan and line the bottom with parchment paper.
In a large mixing bowl, cream together the softened butter and granulated sugar until light and fluffy.
Add the vanilla extract to the butter-sugar mixture. Mix well.
Separate the egg yolks from the whites. Add the egg yolks to the butter-sugar mixture one at a time, ensuring each is fully incorporated before adding the next
Gently fold in the whole milk ricotta and lemon zest into the mixture until well combined.
In a separate bowl, whisk the egg whites with a pinch of salt until stiff peaks form.
Gradually fold the almond flour and the baking powder into the ricotta mixture, ensuring it is well incorporated.
Carefully fold the whipped egg whites into the batter in two or three additions. Be gentle to maintain the light and fluffy texture.
Pour the batter into the prepared springform pan, smoothing the top with a spatula.
Sprinkle the sliced almonds evenly over the batter.
Bake in the preheated oven for 45-50 minutes or until a toothpick inserted into the center comes out clean.
Allow the cake to cool in the pan for about 15 minutes, then transfer it to a wire rack to cool completely. Dust with powder sugar.
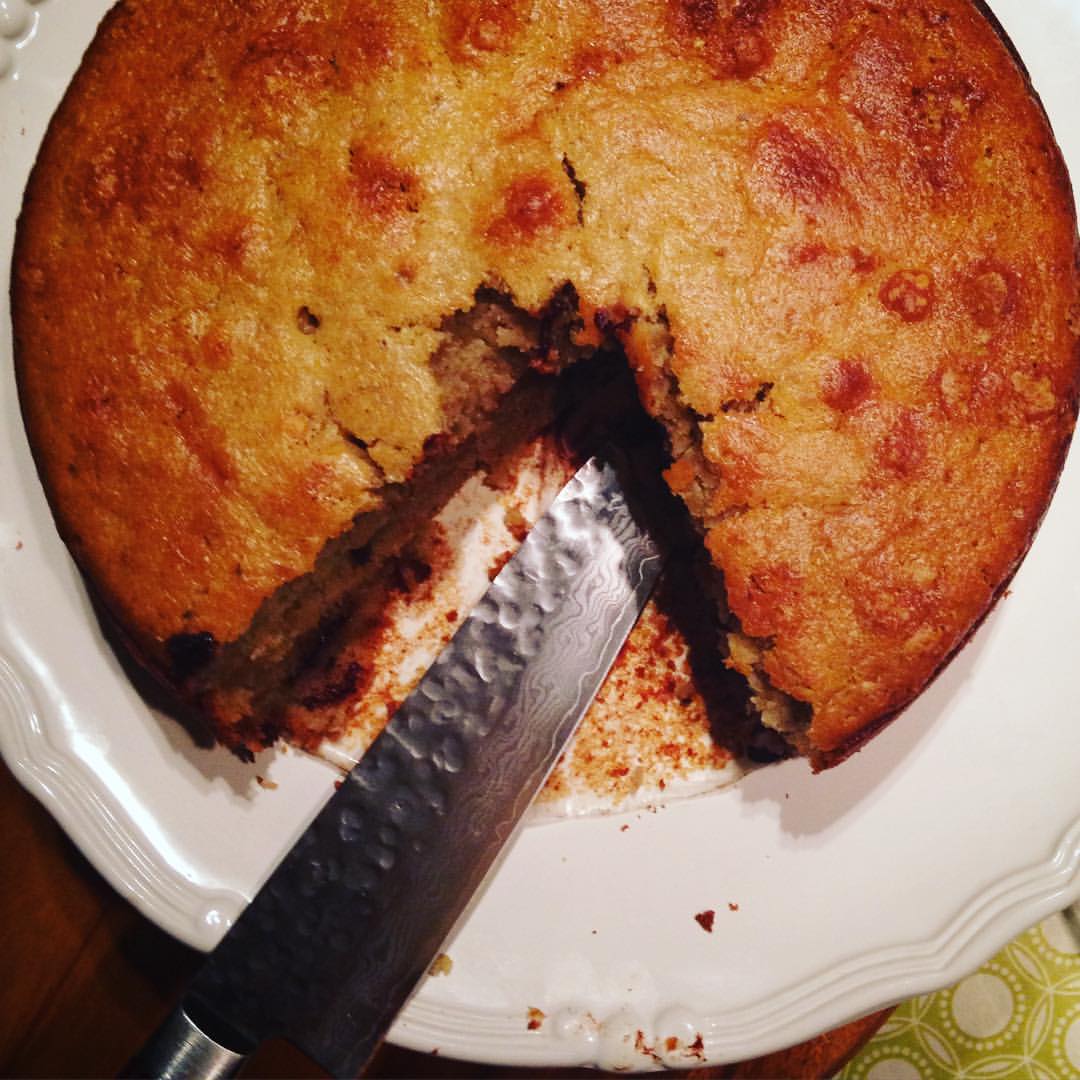
Recipe by Silvia Baldini — When life gives you too many bananas you make gooey chocolate, coconut and rum cake. 20 minutes to make, one hour to bake. Eat warm out of the oven with a large scoop of bourbon vanilla ice cream or caramel crunch would be nice too.
Recipe by Silvia Baldini — When life gives you too many bananas you make gooey chocolate, coconut and rum cake. 20 minutes to make, one hour to bake. Eat warm out of the oven with a large scoop of bourbon vanilla ice cream or caramel crunch would be nice too.
1 1/2cupmashed ripe bananas4 bananas with brown spots
2cupsall-purpose flour300g
1/2cupshredded desiccated coconut50g
2tspbaking powder
1/2tspbicarbonate (baking) soda
1/4tspsalt
1 1/4stickunsalted butter softened150g
1 1/4cupcaster granulated sugar225g
1/2tspvanilla extract
2tablespoons rumoptional
3largeeggs
3 1/2ozdark chocolate finally chopped100g
Frosting
7ozdark chocolate200g broken in to pieces
3/4cupicing confectioner sugar160g
1/2cupsour cream225ml
Servings: people
Instructions
Cake
Heat the oven to 150c/325f
Butter a 9 1/2 inch-24cm spring form cake pan and line with baking parchment.
Place the milk and lemon in a bowl and let stand for 10 minutes to sour the milk, then stir in the mashed bananas.
Stir together flour, desiccated coconut, baking powder and baking soda with the salt. With a stand in mixer or by hand, beat together butter, sugar and vanilla until light and fluffy. Beat eggs one at the time. Add the Rum if using. Add one-third of the flour mix to the creamed mixture and gently beat in. Add one-third of the banana mixture and gently beat in. Alternately add the remaining flour and banana until combined. Gently fold in the chocolate. Spread the batter over the base of the lined spring form.
Bake for 1 hour and 10 minutes, until the sides have pulled away from the spring form. Transfer to a wire rack and leave to cool for 15 minutes before turning out on the rack and leaving to cool completely.
Frosting/ Optional
Melt the chocolate in a bowl over a pan of simmering water. Stir until smoothly combined. Cool slightly. Gradually beat in the icing sugar. Stir in the sour cream until thick, smooth and glossy. Use immediately.
Recipe Notes
The frosting is very good and very festive but not necessary. I like this cake plain most of the times.
You can substitute half of the dark chocolate with the same amount of white chocolate for a truly decadent treat.
Use good quality chocolate it makes a difference.
The bananas need to be very ripe with brown speckled skins to achieve perfect flavor and texture.
Recipe by Silvia Baldini— Buckwheat and hazelnut are a good match and make this cake truly gluten free. Each slice is moist but dense in a delightfully rustic way. I add a whole grated apple to the batter, a touch of vanilla and just enough lemon peel to balance the flavor. After I bake it, I let cool completely on a rack, then I slice it in two even disks and I fill it with homemade blueberry or raspberry jam, and I dust the top with a generous amount of powder sugar. Buckwheat cake is known as torta di grano saraceno and it’s a very traditional recipe from Alto Adige in Italy's most northern corner. It's eaten for breakfast with coffee or as an afternoon snack with tea.
Recipe by Silvia Baldini— Buckwheat and hazelnut are a good match and make this cake truly gluten free. Each slice is moist but dense in a delightfully rustic way. I add a whole grated apple to the batter, a touch of vanilla and just enough lemon peel to balance the flavor. After I bake it, I let cool completely on a rack, then I slice it in two even disks and I fill it with homemade blueberry or raspberry jam, and I dust the top with a generous amount of powder sugar. Buckwheat cake is known as torta di grano saraceno and it’s a very traditional recipe from Alto Adige in Italy's most northern corner. It's eaten for breakfast with coffee or as an afternoon snack with tea.
1 1/4 cup (150 grams)grounded hazelnutsalmond meal can be substitute
1/4cup (30 grams)potato flour
1teaspoon baking powder
1mediumapple, peeled and grated
1/2mediumgrated lemon peel
7ounces (200 grams)blueberry jamlingonberry or raspberries jam can be substitute
Servings: slices
Instructions
Pre-heat the oven at 350ºF and line a greased 9-inch round baking tin with the removable bottom with baking paper.
Beat the egg whites to stiff peaks with half of the sugar and a pinch of salt and set aside. Cream together the butter and remaining sugar. Add the egg yolks and vanilla extract and beat until pale and creamy. Add the buckwheat, hazelnuts, potato flour, grated apple, grated lemon peel and the baking powder until just combined.
Gently fold in the eggs white, bit by bit, into the batter until well combined and pour batter into the greased and lined baking tin.
Bake in a medium oven at 350ºF for about 40 minutes or until the cake is deep golden brown on top and a skewer inserted in the middle of the cake comes out clean.
When cool enough to handle, remove cake from tin and slice in half lengthways. Spread the bottom layer with blueberries jam and replace the top layer. Just before serving, dust with powdered sugar.
Recipe by Silvia Baldini — This coffee and Nutella cake is another soft, no butter bundt cake.
There is a secret to keep the center gooey and chocolatey. Simply bake half of the cake batter for 12 minutes and then add the Nutella. Cover with the remaining batter and finish to bake. YUM! A heart of Nutella!
Preheat the oven at 350 degrees F. Grease the bottoms and the sides of a 9 inches round tube cake pan. Line with parchment paper. You can use a bundt cake but I would select a simple design or the cake will stick to the pan. A spring form pan works as well.
Make one espresso shot and add the two teaspoons of instant coffee to it. Mix and set aside.
In a stand in mixer, fitted with a wire whisk attachment, cream the eggs with the sugar until light and fluffy. About 10 minutes.
Slow down the whisk and add the milk a little bit at the time until mixed in, then add the vanilla extract, the coffee and then slowly add the sunflower oil and then the flour, the baking powder and the salt. Keep mixing until well combined scraping down after each addition.
Pour half of the cake batter in the prepared pan and spread with a knife or a silicon spatula.
Bake for 12 minutes in the preheated oven. Take the cake out of the oven and spoon the Nutella on the half baked batter in a concentric circle. Cover with the remaining cake batter.
Put back in the hot oven for another 25 to 27 minutes, until golden and firm. Use a toothpick to test the cake to see if it is cooked in the center.
Remove the cake and place on a wire rack to cool. Do not remove the cake from the pan until cooled. Sprinkle with powder sugar before serving or with sifted cocoa powder.
The 7 yogurtcontainers yellow cake. Aways a smashing success. You don’t even need a scale or measuring cup to make it. Just use the small single-portion container from the yogurt to measure the other ingredients. The perfect project for a beginner baker! Immune-boosting probiotics make this heavenly vanilla scented confection a relatively healthful pièce de résistance for any occasion, whether a dinner party or a rainy afternoon baking project. And it’s low in sugar compared to many cakes and has no butter. Watch those tall slices disappear.
2 containers all-purpose flour00 flour is also a good choice
1tspbaking powder
1/2tspsalt
Servings: slices
Instructions
Preheat the oven to 350°F. Oil a 9-inch round springform cake pan and line it with parchment paper cut to fit the pan.
Place the yogurt in the bowl of a stand mixer, add the sugar and beat until creamy and smooth.
Separate the eggs and place the yolks and whites in separate bowls. Set the egg whites aside for the moment. Add the egg yolks to the yogurt mixture, 1 at a time, mixing until each yolk is incorporated before adding the next. With the motor running, slowly add the oil and the vanilla extract.
With the motor on low, slowly add the potato starch and mix until incorporated. Then add the flour, baking powder and salt and mix well.
Whisk the whites until firm peaks form. Using a rubber spatula, gently and slowly fold the eggs whites into the batter by hand and mix just until incorporated. Gently pour the batter into the prepared cake pan.
Bake the cake for 45 minutes, or until golden brown. You may need to cover the cake with parchment paper during the last 10 minutes to prevent the top from burning.
Place the pan on a wire rack and let cool for 10 minutes. Unmold the cake and let it cool completely.
Recipe Notes
I like to dust this soft cake with a generous amount of powder sugar. Those times when I want a slightly less sweet cake, I modify the recipe by cutting the granulated sugar in the batter to one container.
The 7 yogurt containers cake. Always a smashing succes. You don’t need a scale or measuring cups because you use a small yogurt cointaner, a single portion 125ml, to measure all the ingredients. Probiotics and immune system boosters make this soft, heavenly vanilla scented confection, low in sugar and with no butter, a piece de resistance for a rainy afternoon baking project. See those yellow, tall, crumbly slices disappear.
2 containers all-purpose flour00 flour is also a good choice
1tspbaking powder
1/2tspsalt
Servings: slices
Instructions
Preheat the oven to 350°F. Oil a 9-inch round springform cake pan and line it with parchment paper cut to fit the pan.
Place the yogurt in the bowl of a stand mixer, add the sugar and beat until creamy and smooth.
Separate the eggs and place the yolks and whites in separate bowls. Set the egg whites aside for the moment. Add the egg yolks to the yogurt mixture, 1 at a time, mixing until each yolk is incorporated before adding the next. With the motor running, slowly add the oil and the vanilla extract.
With the motor on low, slowly add the potato starch and mix until incorporated. Then add the flour, baking powder and salt and mix well.
Whisk the whites until firm peaks form. Using a rubber spatula, gently and slowly fold the eggs whites into the batter by hand and mix just until incorporated. Gently pour the batter into the prepared cake pan.
Bake the cake for 45 minutes, or until golden brown. You may need to cover the cake with parchment paper during the last 10 minutes to prevent the top from burning.
Place the pan on a wire rack and let cool for 10 minutes. Unmold the cake and let it cool completely.
Recipe Notes
I like to dust this soft cake with a generous amount of powder sugar. Those times when I want a slightly less sweet cake, I modify the recipe by cutting the granulated sugar in the batter to one container.
Yesterday I shared a picture of my vanilla pound cake and a quote: “Having somewhere to go is home. Having someone to love is family. Having both is a blessing.“ Likes all around. But the main response was, “Nice quote! But where’s the recipe?!” Here it is! This pound cake is a family favorite and one of the simplest cakes you can bake. You cannot mess it up. I promise.
Pound cake derives its name from the original formula from which it was made: one pound of butter, sugar, flour and eggs. Enough to make two loaves. This old-fashioned recipe from my grandma calls for approximately a half pound of each ingredient and yields one loaf. Feel free to double the recipe. Share or freeze one of the loaves or just eat both of them. No judgement!
1cupunsalted butter, plus more for the pan2 sticks
1cupgranulated sugar
5large eggsroom temperature
2tsppure vanilla extract
Servings: 9x5 inch loaf
Instructions
Preheat the oven to 325°F. Butter a 9-by-5-by-3-inch loaf pan.
In a medium bowl, stir together the flour, baking powder and salt.
In a standing mixer bowl, beat the butter until fluffy. Gradually beat in the sugar until blended. Beat in the eggs, 1 at the time, and then add the vanilla. Add the dry ingredients and beat until smooth.
Scrape the batter into the loaf pan and bake until the top peaks and turns golden brown, about 1 hour and 15 minutes. When the cake is done, it will spring back when gently touched and a toothpick inserted in the center comes out clean.
Cool the pound cake in the pan on a wire rack for 10 minutes and then turn the loaf out onto the rack to cool throughly. Slice and serve.
Recipe Notes
Sometimes I like to add the grated zest from an organic lemon for a citrusy burst of flavor or a handful of chocolate chips for extra happiness.
Who needs boringand fatteningpound cake when you can havemenopause cake? This dense and not-so-sweet cake, adapted from a Women’s Weekly recipe, is packed with ingredients that can help minimize menopausal and menstrual symptoms. It uses all the healthy goodness of soy, oat flour, and almonds along with the sweetness of sweet potatoes, banana, prunes and figs. One slice a day is all you need for pure girl power bliss!
1mediumsweet potato (about 5 oz)peeled and chopped
3 1/2ozdried figs roughly chopped
3 1/2ozsoy flour
3 1/2ozself rising wholemealSee note below
3 1/2ozoatmeal
1 1/34ozflax seedsGround
1 1/34ozpumpkin seeds
1 1/34ozground almonds
3 1/2 ozchopped walnuts
1tspground allspice
4ozchopped pitted prunes
1tbspgolden syrup or molasses
2largeeggs
7 1/2fl ozskim milk
1medium or largeripe banana, mashed
Servings: slices
Instructions
Preheat the oven at 350°F and line a 9 x 5 loaf pan with parchment paper.
Microwave the sweet potato pieces on high in 1 tablespoon water for 5 minutes or until soft, and then use the back of a fork or spoon to mash the sweet potatoes with the water. Soften the figs in 4fl oz of hot water for 10 minutes and then mash the figs and the water with a handheld blender.
Meanwhile, combine the flours and oatmeal in a large bowl. Stir in the seeds, nuts, the allspice and then the chopped prunes.
In another bowl, combine the syrup or molasses with the eggs and milk. Stir in the sweet potato mash, the fig purée and the mashed banana and combine well (you can whizz in the blender, if you like).
Thoroughly mix the wet ingredients into the dry ingredients and then spoon the mixture into the prepared loaf pan.
Bake in the oven at 350°F for 1 hour or until nicely golden and a skewer inserted into the center comes out clean. Let cool in the pan on a wire rack and then remove the cake from the pan and cut into slices. You can store leftovers (if there are any!) in an airtight container or wrap individual slices in plastic wrap and then place in a resealable plastic bag and freeze.
Recipe Notes
If you cannot find self rising whole meal flour you can easily make it at home. Combine 1 cup all-purpose flour, 1 cup all wheat flour, 1 1/4 teaspoon baking powder and 1/4 teaspoon of salt
3packskit Kat barsget a couple of extra packs for safety
1bagM&M'ssmarties or jellybeans are fun too
1medium Jarnutellachocolate frosting can be used instead
Servings: people
Instructions
Heat the oven at 350, butter and flour or spray with baking spray two 10 inches baking pans.
Put the eggs, sugar and lemon zest and vanilla extract in a bowl of your stand mixer. Beat the eggs until very fluffy and pale yellow (about 15 minutes on medium/high speed). To test that it has been beaten enough, let some of the mixture fall into the bowl, it will make stiff ribbons.
Sift the flour and baking powder on top of the egg mixture, a little at a time, and fold it gently with a wooden spoon.
Pour the batter into the prepared pans. Don't smooth the top or bang the pan on the counter, leave it as it is!
Bake for 25 to 30 minutes minutes or until a toothpick inserted into the center comes out clean. (Remember: do not open the oven for the first 20 minutes!)
Turn off the oven but leave the cake inside (put a wooden spoon to keep the oven door slightly open) for at least 10 minutes so it can cool down slowly. After that, remove it from the oven, let it cool 10 more minutes, loosen around the edges with a knife, then flip the cake on a wire rack upside down (without the pan) to cool completely.
Chocolate Custard
Melt the Chocolate in a double boiler or in the microwave, set aside.
Heat milk in a medium heavy saucepan with the lemon zest until bubbles appear around edge.
Beat egg yolks and sugar in a large bowl with wire whisk or mixer until pale yellow and thick. Beat in flour until well mixed.
Gradually beat in hot milk; pour all back into saucepan. Cook, stirring constantly, over moderately high heat until mixture thickens and comes to boiling, lower heat. Mixture will be lumpy in the beginning, but lumps disappear during cooking and stirring.
Add the melted chocolate and stir well.
Continue cooking 2 to 3 minutes, over low heat, stirring constantly. Mixture will be quite thick.
Chill at least 2 hours. If filling becomes too stiff after it's chilled, gradually stir in 2 to 4 tablespoons cream or milk, 1 tablespoon at a time.
Assembly and Decoration
Slice the 2 cakes in 4 even layers.
Place the first layer on a cake stand or a card board round mat if you plan to transport the cake. You can spread a dollop of cream on the cake stand base or on the cardboard to glue the cake.
Spread enough chocolate cream to cover the surface on the top of the first layer then place the second half of the cake on top of the cream. Repeat the process until you have all for layers stacked.
With a metal spatula or a knife cover the whole cake in an even coat of Nutella or chocolate frosting. This will be the glue for your Kit Kat bars.
Break apart approximately 36 Kit Kats, 2 at the times. Begin to place them around the cake and cover the diameter. Tie with a ribbon, if desired. Top with M&M's.
Recipe Notes
Make the cakes the day before. Keep overnight in an air tight container. You can bake them 3 days ahead or even freeze them.
Make sure your layer cakes are not taller than a Kit Kat.
You may want to freeze your Kit Kats to avoid fingerprints.
You can use your favorite frosting instead of the custard and the Nutella.
Prep one 9 Inches square baking pan. Line with parchment.
Heat oven at 350 F
Make the Topping. Melt the butter and sugar together in a small pan over medium heat until bubbling, creamy and medium caramel color. Pour in to the cake pan and spread evenly tilting the pan.
Peel, core and half the pears. I also sometimes don’t core them because they look prettier left whole.
Arrange the pears side down in the pan.
Make the ginger bread. Sift the flour, soda, cinnamon, ginger, nutmeg and cloves together in a bowl. In another bowl, place the beaten eggs, brown sugar, molasses, milk and melted butter.
Combine, gently, the flour mixture with the egg mixture to make a smooth batter.
Pour over the pears in the baking pan.
Place the pan over an oven tray and bake for 45 to 55 minute until a skewer comes out clean from the center of the cake.
Transfer to a wire rack to cool for a few minute. Run a knife around the edges.
Carefully cover with a large serving plate and turn around quickly.
Quickly serve warm or room temperature
Recipe Notes
Note: keeps well for a couple of days in an airtight container.


