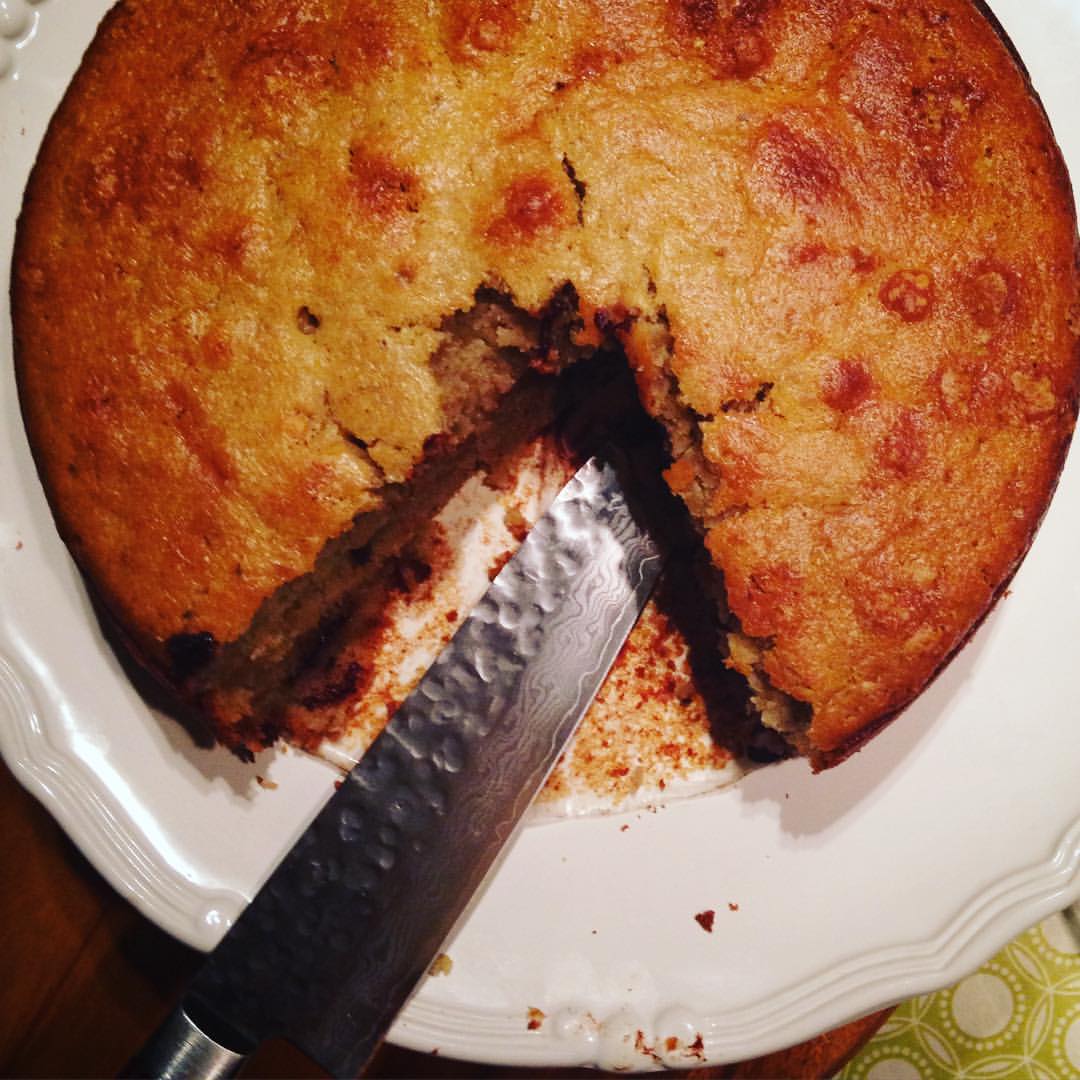
Courses Archives: Cakes

Soft Almond and Lemon Ricotta Cake

Soft Almond and Lemon Ricotta Cake
Yum
Print Recipe
Recipe by Silvia Baldini — Indulge in this Italian classic, perfect for a midafternoon snack or breakfast. This Soft Almond and Lemon Ricotta Cake marries the rich, soft creaminess of ricotta cheese with the irresistible flavors of almond and lemon. Best part, it's naturally gluten-free, thanks to the exclusive use of almond flour. Enjoy.
Servings Prep Time
8-10 people 25 minutes
Cook Time
40-45
Servings Prep Time
8-10 people 25 minutes
Cook Time
40-45
Ingredients
  • 4 oz (115g) unsalted butter softened
  • ¾ cup (150g) granulated sugar
  • 1 teaspoon vanilla extract
  • 4 large eggs, separated
  • 15 oz (425g) whole milk ricotta
  • 2 large lemons, finely grated zest
  • 2 cups (200g) almond flour
  • ¼ teaspoon baking powder
  • 1 pinch fine sea salt
  • ½ cup sliced almonds
  • 2 tablespoons powdered sugar for dusting
Servings: people
Instructions
  1. Preheat your oven to 350°F Grease a 9-inch (23cm) springform pan and line the bottom with parchment paper.
  2. In a large mixing bowl, cream together the softened butter and granulated sugar until light and fluffy.
  3. Add the vanilla extract to the butter-sugar mixture. Mix well.
  4. Separate the egg yolks from the whites. Add the egg yolks to the butter-sugar mixture one at a time, ensuring each is fully incorporated before adding the next
  5. Gently fold in the whole milk ricotta and lemon zest into the mixture until well combined.
  6. In a separate bowl, whisk the egg whites with a pinch of salt until stiff peaks form.
  7. Gradually fold the almond flour and the baking powder into the ricotta mixture, ensuring it is well incorporated.
  8. Carefully fold the whipped egg whites into the batter in two or three additions. Be gentle to maintain the light and fluffy texture.
  9. Pour the batter into the prepared springform pan, smoothing the top with a spatula.
  10. Sprinkle the sliced almonds evenly over the batter.
  11. Bake in the preheated oven for 45-50 minutes or until a toothpick inserted into the center comes out clean. Allow the cake to cool in the pan for about 15 minutes, then transfer it to a wire rack to cool completely. Dust with powder sugar.
Share this Recipe
Continue Reading

Pastiera

Pastiera Napoletana (Easter Pie)
Yum
Print Recipe
Recipe by Silvia Baldini — I have baked hundreds of wheat pies in search of the perfect one. This recipe is the one. I make a quick pasta frolla (crostata dough) by combining crumbly butter, flour and one egg. I cook the wheat berries in milk until creamy then blend half for a smooth but textured consistency. I mix the wheat with the drained ricotta, sugar, eggs, candied fruit and real orange blossom essence for the creamy filling. I wouldn't be honest if I didn't warn you— this pie is laborious and steps intensive. But the results are intoxicating.
Servings Prep Time
1 9 inches pie 2 ½ hours, plus cooling and resting time
Cook Time
1 ½
Servings Prep Time
1 9 inches pie 2 ½ hours, plus cooling and resting time
Cook Time
1 ½
Ingredients
Dough
  • 8 tablespoons Butter 1 stick
  • 2 cups 00 flour
  • cup granulated sugar
  • 2 teaspoons grated lemon zest
  • 1 large egg
  • ¼ teaspoon baking powder
Wheat Filling
  • 1 can cooked wheat, 14.8 onces grain
  • cup whole cow milk
  • 1 teaspoon Butter
  • 4 tablespoons orange zest
Ricotta Cream
  • 1 ½ cups fresh ricotta, drained
  • 3 large eggs
  • 1 ½ cups granulated sugar
  • 4 tablespoons orange zest
  • 1 teaspoon orange blossom essence
  • 1 teaspoon natural vanilla extract
  • ¼ teaspoon fine sea salt
  • ½ teaspoon 3 cinnamon powder, optional
  • ½ cup candied fruit, optional
Finishing
  • 4 to 5 tablespoons confetioners' sugar
Servings: 9 inches pie
Instructions
Dough
  1. Place the butter, flour, sugar, lemon zest, egg and baking powder in the workbowl of a food processor fitted with a metal blade and pulse until all ingredients are blended, then process just until you have a smooth dough. Stop once or twice to scrape down the sides of the bowl. Wrap the dough in plastic film and chill for at least an hour, or up to 1 day.
Wheat Filling
  1. Put the wheat grain in a heavy bottom medium sized pot. Mix in the milk add the butter and the lemon zest. Bring to a gentle simmer on a low flame and cook, stirring occasionally, until the wheat kernels are tender, and the milk is absorbed, about 15 to 20 minutes. Stir and scrape the bottom occasionally to avoid burning.
  2. Place half of the cooked wheat filling in to a blender and blend until creamy and smooth. Scrape back in to the cooked wheat, mix well and set aside to cool off.
Ricotta Filling
  1. Drain the ricotta in a sieve over a bowl until all the liquid is gone. You can drain the ricotta overnight or at least an hour before making the filling.
  2. Place the drained ricotta in a large bowl. Add the eggs, sugar and mix with a wooden spoon then beat until light and fluffy. Add the orange zest, the orange blossom water, vanilla, salt and cinnamon if using. Mix. Scatter the candied fruit, if using and fold together with a rubber spatula until blended.
  3. Fold the cooled wheat filling in to the ricotta cream and mix gently until incorporated.
Pie Assembly and Cooking
  1. Preheat the oven to 350 degrees F. Butter a 9-inch springform pan. Roll out two-thirds of the dough into a 14-inch circle. Fold the circle in quarters, place one of the points in the center of the buttered pan and unfold the dough, pressing it gently against the bottoms and sides and into the corners of the pan.
  2. Scrape the filling into the dough-lined pan. Make a lattice top by alternating strips of the pre-cut dough in alternating directions. Join the strips of dough to dough along the sides of the pan by pressing gently. Traditionally in Italy we use 7 stripes of dough to make the lattice. Place 4 strips diagonally at the bottom and 3 on the top.
  3. Bake until golden brown and the center feels springy, about 1 ½ hours. Remove and cool completely before serving. It will be better a day or two after baking. Once the pie is cooled off rest in a cool place wrapped with foil. Sprinkle with confectioners’ sugar before serving.
Recipe Notes
  • Use fresh sheep ricotta if available or a good quality artisanal cow milk ricotta
  • Drain the ricotta overnight. Place in a sieve over a bowl and rest covered in the refrigerator
  • You can buy canned or jarred cooked wheat on Amazon or in any good  Italian deli
  • Use good quality orange blossom flower essence to avoid soapy taste
Share this Recipe
Continue Reading

Crushed Citrus and Almond Cake

Crushed Citrus and Almond Cake
Yum
Print Recipe
Recipe by Silvia Baldini— I tasted my first almond and citrus cake in Sicily. 
I’ll never forget how my first forkful exploded in my mouth with the concentrated flavor of oranges and almonds. “Pan d’Arancio”, which literally translates from italian as orange bread, is baked by using only almond flour and the whole orange; juice, peel and pulp. This is the reason why this cake has a very moist and soft texture with a slight bitter taste and it is completely gluten free. The cake takes some time to prep but once you boil and crush the tangerines, or oranges in a food processor or a blender you are home-free. I have made this cake with oranges, lemons and even kumquats, but tangerines are by far the family favorites. When I make it with lemons I increase the sugar amount by about 2 teaspoons to balance the bitterness. I dust the top of the cake with powder sugar right before serving it or on special occasions, I drizzle it with a thick sugar and citrus glaze. Blood oranges give a gorgeous festive pink/red tint to the cake and to the glaze.
Servings Prep Time
8/10 2 hours for boiling the citrus, 20 minutes to prep
Cook Time
1 hour
Servings Prep Time
8/10 2 hours for boiling the citrus, 20 minutes to prep
Cook Time
1 hour
Ingredients
  • 4-5 medium tangerines or 3 oranges, or 3 lemons, or 1 cup of kumquats
  • 6 large eggs
  • 1 ¼ cup superfine (caster) granulated sugar add 2 extra teaspoons of sugar if using lemons
  • 2 1/3 cups ground almonds
  • 1 full tespoon baking powder
Servings:
Instructions
  1. Put the tangerines in a pot with enough water to cover them, bring to a boil and cook for 2 hours. Drain and cool. Cut the tangerines in half and remove the seeds. Chop the skins, pulp, pith and fruit in a processor or by hand.
  2. Preheat the oven at 375F/190C Butter and line an 8-ich springform cake pan.
  3. Beat the eggs. Add the sugar, almonds and baking powder. Mix well and add the crushed tangerine, folding them in by hand.
  4. Pour the cake mixture in to the lined springform and bake for one hour, until a skewer comes out clean. Cover the cake with foil after about 40 minutes of baking to stop from burning.
  5. Cool cake in the spring-form on a rack. When cold take it out. You can glaze it, or cover with powder sugar.
Recipe Notes

To make a simple cake glaze mix 2 cups of powder sugar with a few drops of your favorite citrus juice. I put the sugar in a metal bowl and I add a few drops of juice at the time while whisking. I keep adding drops and whisking until the glaze is smooth but thick.

Share this Recipe
Continue Reading

Silvia’s Cherry Clafoutis

Silvia's Cherry Clafoutis
Yum
Print Recipe
Recipe by Silvia Baldini: Clafoutis is a simple, delicate and sweet dessert. It can be made quickly while the rest of dinner is in the oven. All sorts of berries and even apricots can be used but I prefer the original version with cherries. I leave the pits in the dish because I like the almond, bitter flavor I get when I bake this soft treat with the cherries whole. The pits contain amygdalin, the chemical that makes almond extract taste like almonds. Clafoutis is fantastic warm out of the oven, or cold the day after with a dollop of cream, ice cream or yogurt.
Servings Prep Time
6 to 8 people 15 minutes
Cook Time
45-50 minutes
Servings Prep Time
6 to 8 people 15 minutes
Cook Time
45-50 minutes
Ingredients
  • 1 1/2 cups heavy whipping cream
  • 1/2 cup all-purpose flour
  • 1/3 cup plus 2 tablespoons granulated sugar, divided
  • 3 large eggs
  • 2 tablespoons melted butter, cooled
  • 2 tablespoons vanilla extract
  • 3/4 teaspoon fine sea salt
  • 1/4 teaspoon almond extract to be used if cherries are pitted
  • 3 cups fresh cherries pits on preferred
  • 2 tablespoons confectioner sugar for garnishing
Servings: people
Instructions
  1. Preheat the oven to 350°F. Lightly grease a 9" x 2" round cake pan, or a 9" pie pan at least 1 1/2" deep or a medium-size flameproof baking dish at least 1 1/2 inches deep.
  2. In a medium bowl, whisk together cream, flour, the 1/3 of a cup of granulated sugar, eggs, melted butter, vanilla, salt and almond extract if using (use if you prefer to pit the cherries). Let is stand for 10 minutes.
  3. Pour a 1/4-inch layer of batter in the baking dish. Bake in the oven for 10 minutes until a film of batter has set in the bottom of the dish.
  4. Spread cherries over the batter and sprinkle on the remaining 2 tablespoons of granulated sugar. Pour on the rest of the batter and smooth with the back of a spoon. Place in the center of the oven and bake about 45 minutes, until top is puffed and browned and a tester plunged into its center comes out clean.
  5. Remove the clafoutis from the oven, garnish with the confectioners' sugar and serve it in wedges, warm or at room temperature. A dab of whipped cream or ice cream is entirely appropriate and delicious. Store refrigerated for 2 to 3 days.
  6. Store refrigerated for 2 to 3 days.
Recipe Notes

Don't over whisk the batter, because it forms bubbles on top of the custard when baking.

Share this Recipe
Continue Reading

Rhubarb Tartlets

Rhubarb Tartlets
Yum
Print Recipe
Recipe by Silvia Baldini — I'm a big fan of thick and crunchy rhubarb stalks. I especially appreciate the sourness of the field-grown plants, which are pronounced in flavor and have cherry red stalks and deep green leaves. Rhubarb season starts now, in March and it peaks in June-July. I recently found a good looking bunch at my local store and I couldn't resit baking a few tartlets. I prefer to free form my tartlets and bake them on rimmed baking sheets, always lined with baking paper, to catch the inevitable cooking juices. You can also make a large tart in a removable bottom pan, however I personally enjoy a little chaos in my kitchen. I brush the dough with melted butter and sprinkle it with sugar to make a crispy crust. I cover the bottom of the tartlets with a couple of spoons of almond flour to absorb the cooking juices. Even if it's not season yet, I decided to threw in a handful of sliced strawberries to help balance the rhubarb tartness, (blueberries, cherries or pineapple chunks would work as well).
Servings Prep Time
4 individual tartlets 30 minutes plus resting time
Cook Time Passive Time
45 minutes 30 minutes for resting time
Servings Prep Time
4 individual tartlets 30 minutes plus resting time
Cook Time Passive Time
45 minutes 30 minutes for resting time
Ingredients
Tartlets Dough
  • 1 ½ cups flour
  • ½ medium orange zested, organic
  • ½ teaspoon fine sea salt
  • ¾ cup unsalted butter, cubed and chilled
  • 6 tablespoons iced water
Rhubarb Filling
  • 10 medium stalks rhubarb, (trimmed and cut into 4-inches pieces)
  • ½ medium orange zested, organic
  • ½ cup fresh orange juice
  • 2 tabelspoons Honey
  • cup granulated sugar
  • 1 ½ tablespoons corn starch
  • 4 tabelspoons almond flour
  • 1 ½ tabelspoons melted unsalted butter
  • granulated sugar, for finishing the tart

Servings: individual tartlets
Instructions
Make the dough
  1. In a food processor, pulse the flour, orange zest and salt. Add the butter and process briefly. Sprinkle over the ice-cold water and pulse for about 5 seconds, until just moistened.
  2. Transfer the dough to a floured work surface and knead it 2 or 3 times until it comes together. Pat the dough into a disc. Lay a sheet of baking parchment on your work surface and dust it with flour. Roll out the dough and shape in 4 individual circles, about 5 inches in diameter or make an individual 13 inches circle, 1/4 of an inch thick to use in a tart pan. Transfer the parchment to a rimmed baking sheet and chill the pastry in the refrigerator for at least 30 minutes.
Make the filling
  1. Preheat the oven to 400°F. Toss the rhubarb in a bowl with the orange zest, juice, honey, sugar, salt, corn starch and mix well.
Assemble the tartlets
  1. Sprinkle the almond flower at the bottom of the rolled out tart or divide between the individual tartlets.
 Arrange the rhubarb on top of the pastry and sprinkle over any remaining sugary mixture. Leave a border of 2 inches around the edge of the pastry, fold in and crimp with a fork. Brush the fruit with melted butter and sprinkle with caster sugar. Bake for 10–12 minutes, then lower the oven temperature to 375°F and then bake for a further 30–35 minutes.
Share this Recipe
Continue Reading

Chocolate Banana Cake


Chocolate Banana Cake
Yum
Print Recipe
Recipe by Silvia Baldini — When life gives you too many bananas you make gooey chocolate, coconut and rum cake. 20 minutes to make, one hour to bake. Eat warm out of the oven with a large scoop of bourbon vanilla ice cream or caramel crunch would be nice too.
Servings Prep Time
8/10 people 25 minutes
Cook Time
1 plus 10m hour
Servings Prep Time
8/10 people 25 minutes
Cook Time
1 plus 10m hour
Ingredients
Cake
  • 2/3 cup plus one tablespoon milk 160 ml
  • 2 tsp lemon juice
  • 1 1/2 cup mashed ripe bananas 4 bananas with brown spots
  • 2 cups all-purpose flour 300g
  • 1/2 cup shredded desiccated coconut 50g
  • 2 tsp baking powder
  • 1/2 tsp bicarbonate (baking) soda
  • 1/4 tsp salt
  • 1 1/4 stick unsalted butter softened 150g
  • 1 1/4 cup caster granulated sugar 225g
  • 1/2 tsp vanilla extract
  • 2 tablespoons rum optional
  • 3 large eggs
  • 3 1/2 oz dark chocolate finally chopped 100g
Frosting
  • 7 oz dark chocolate 200g broken in to pieces
  • 3/4 cup icing confectioner sugar 160g
  • 1/2 cup sour cream 225ml
Servings: people
Instructions
Cake
  1. Heat the oven to 150c/325f Butter a 9 1/2 inch-24cm spring form cake pan and line with baking parchment.
  2. Place the milk and lemon in a bowl and let stand for 10 minutes to sour the milk, then stir in the mashed bananas.
  3. Stir together flour, desiccated coconut, baking powder and baking soda with the salt. With a stand in mixer or by hand, beat together butter, sugar and vanilla until light and fluffy. Beat eggs one at the time. Add the Rum if using. Add one-third of the flour mix to the creamed mixture and gently beat in. Add one-third of the banana mixture and gently beat in. Alternately add the remaining flour and banana until combined. Gently fold in the chocolate. Spread the batter over the base of the lined spring form.
  4. Bake for 1 hour and 10 minutes, until the sides have pulled away from the spring form. Transfer to a wire rack and leave to cool for 15 minutes before turning out on the rack and leaving to cool completely.
Frosting/ Optional
  1. Melt the chocolate in a bowl over a pan of simmering water. Stir until smoothly combined. Cool slightly. Gradually beat in the icing sugar. Stir in the sour cream until thick, smooth and glossy. Use immediately.
Recipe Notes

The frosting is very good and very festive but not necessary. I like this cake plain most of the times.

You can substitute half of the dark chocolate with the same amount of white chocolate for a truly decadent treat.

Use good quality chocolate it makes a difference.

The bananas need to be very ripe with brown speckled skins  to achieve perfect flavor and texture.

Share this Recipe
Continue Reading

Cherry Brown Butter Chocolate Bars

Cherry Brown Butter Chocolate Bars
Yum
Print Recipe
Recipe by Silvia Baldini—Sweet and plump cherries, chocolate, almonds and brown butter all baked on a crispy crust. These crumbly bars are a great late spring — early summer treat. Add a generous scoop of vanilla ice cream or a dollop of whipped cream to turn them in to a decadent dessert. Substitute the cherries with raspberries or blackberries, or even halved and pitted apricot. Soft, chocolaty and fruity. A small triumph of flavors and textures.
Servings Prep Time
12 bars 30 minutes
Cook Time
45-55 minutes
Servings Prep Time
12 bars 30 minutes
Cook Time
45-55 minutes
Ingredients
Crust
  • 8 tablespoons unsalted butter, melted
  • 1/3 cup sugar
  • 1/2 teaspoons pure vanilla extract
  • 1 cup all-purpose flour
  • 4 tablespoons almond flour
  • 3 tablespoons cocoa powder
  • 1 pinch salt
Filling
  • 1 stick unsalted butter, cut into pieces
  • 1/2 cup sugar
  • 2 large eggs
  • 1 pinch salt
  • 1/4 cup all-purpose flour
  • 2 1/2 tablespoons cocoa powder
  • 1 teaspoon pure vanilla extract
  • 1 pound cherries, pitted
  • 1/2 cup dark chocolate chopped
Servings: bars
Instructions
Crust
  1. Preheat over to 375°F. Line bottom and sides of 8×8-inch square baking pan with baking paper. Leave paper two inches over the rim. It will help you lift the bars once baked. mix melted butter, sugar, and vanilla in medium bowl, Add flour, almond flour, cocoa powder and salt and stir until incorporated. Transfer dough to your prepared pan, press the dough evenly across the bottom of the pan. Prick crust with a fork to prevent from puffing up. Bake the crust until golden, about 18 minutes ,Transfer crust to rack and cool in pan.
Filling
  1. Cook butter in heavy small saucepan over medium heat until deep nutty brown (do not burn), stirring often and watching carefully, about six minutes. Cool slightly.
  2. Whisk sugar, eggs, and salt in medium bowl to blend. Add flour, chocolate powder and vanilla and whisk until smooth. Gradually whisk browned butter into sugar-egg mixture; whisk until well blended.
  3. Scatter pitted cherries and chocolate in bottom of cooled crust. Pour browned butter mixture evenly over the fruit and chocolate. Bake until filling is firm and tester inserted into center comes out clean, about 40 minutes, Cool completely in pan on rack.
  4. Remove cooled bars from pan lifting from the overhanging paper and place them on a cutting board . Cut them into squares with a very sharp knife.
Share this Recipe
Continue Reading

Strawberry & Rhubarb Pie

Strawberry & Rhubarb Pie
Yum
Print Recipe
Recipe by Silvia Baldini— adapted from Martha Stewart. Strawberries and rhubarb pie is my favorite pie. I like the tart and sweet combined with the richness of butter. I adapted my recipes from an old Martha Stewart's one because why mess with perfection.
Servings Prep Time
8 servings 1 hour
Cook Time Passive Time
1-15 hours 3 hours
Servings Prep Time
8 servings 1 hour
Cook Time Passive Time
1-15 hours 3 hours
Ingredients
For the Filling
  • 1 1/2 pounds rhubarb
  • 1 1/2 cups strawberries, hulled and chopped
  • 1 cup granulated sugar
  • 2 tablespoons Honey
  • 1 teaspoon finely grated orange zest
  • 3 tablespoons orange juice
  • 1/4 cup cornstarch
  • 1 pinch coarse salt
  • 2 tablespoons butter, cubed
For the Crust/ Pate Brisee 2 disk
  • 2 1/2 cups all-purpose flour
  • 1 cup (2 sticks) butter, cubed
  • 1 teaspoon salt
  • 1/4 cup + iced water
  • egg wash
  • 3 tablespoons granulated sugar
Servings: servings
Instructions
Pie
  1. Preheat oven to 375 degrees. Make the filling: Clean and cut rhubarb in 1 inches pieces. Mix together rhubarb, strawberries, granulated sugar, honey, cornstarch, zest and juice, and 1/4 teaspoon salt.
  2. Make the crust: Roll out 1 disk pate brisee to a 1/8-inch thickness on a lightly floured surface. Fit dough into a 9-inch pie plate. Pour in filling; dot top with butter. Refrigerate while making top crust.
  3. Roll remaining disk pate brisee to a 1/8-inch thickness on a lightly floured surface. Cut into wide strips using a pastry cutter.
  4. Lay 8 strips across pie. Fold back every other strip, and lay a horizontal strip across the center of the pie. Unfold folded strips, then fold back remaining strips. Lay another horizontal strip across pie. Repeat folding and unfolding strips to weave a lattice pattern. Repeat on remaining side.
  5. Seal around edges. Fold edges under, and crimp as desired. Cut stars shapes and hearts with a pastry cutters and decorate. Refrigerate for 30 minutes.
  6. Brush crust with egg wash, and sprinkle sugar. Bake pie on middle rack, with a foil-lined baking sheet on bottom rack to catch juices, until vigorously bubbling in center and bottom crust is golden, about 1 1/5 hours. (Loosely tent with foil after 1 hour if crust is browning too quickly.) Transfer pie to a wire rack, and let cool for at least 2 hours or longer, before serving.
Pate Brise
  1. In the bowl of a food processor, combine flour, salt, and sugar. Add butter, and process until the mixture resembles coarse meal, 8 to 10 seconds.
  2. With machine running, add ice water in a slow, steady stream through feed tube. Pulse until dough holds together without being wet or sticky; be careful not to process more than 30 seconds. To test, squeeze a small amount together: If it is crumbly, add more ice water, 1 tablespoon at a time.
  3. Divide dough into two equal balls. Wrap in plastic. Transfer to the refrigerator and chill at least 1 hour. Dough may be stored, frozen, up to 3 months.
Share this Recipe
Continue Reading

Buckwheat & Hazelnut Cake with Berry Jam

Buckwheat & Hazelnut Cake with Blueberries Jam
Yum
Print Recipe
Recipe by Silvia Baldini— Buckwheat and hazelnut are a good match and make this cake truly gluten free. Each slice is moist but dense in a delightfully rustic way. I add a whole grated apple to the batter, a touch of vanilla and just enough lemon peel to balance the flavor. After I bake it, I let cool completely on a rack, then I slice it in two even disks and I fill it with homemade blueberry or raspberry jam, and I dust the top with a generous amount of powder sugar. Buckwheat cake is known as torta di grano saraceno and it’s a very traditional recipe from Alto Adige in Italy's most northern corner. It's eaten for breakfast with coffee or as an afternoon snack with tea.
Servings Prep Time
8 slices 30 minutes
Cook Time
40 minutes
Servings Prep Time
8 slices 30 minutes
Cook Time
40 minutes
Ingredients
  • 6 large eggs, separated
  • 1 cup (200 grams) sugar
  • 1 pinch salt
  • 1 cup (200 grams) Butter
  • 1 teaspoon vanilla extract
  • 1 1/4 cup (150 grams) buckwheat flour
  • 1 1/4 cup (150 grams) grounded hazelnuts almond meal can be substitute
  • 1/4 cup (30 grams) potato flour
  • 1 teaspoon baking powder
  • 1 medium apple, peeled and grated
  • 1/2 medium grated lemon peel
  • 7 ounces (200 grams) blueberry jam lingonberry or raspberries jam can be substitute
Servings: slices
Instructions
  1. Pre-heat the oven at 350ºF and line a greased 9-inch round baking tin with the removable bottom with baking paper.
  2. Beat the egg whites to stiff peaks with half of the sugar and a pinch of salt and set aside. Cream together the butter and remaining sugar. Add the egg yolks and vanilla extract and beat until pale and creamy. Add the buckwheat, hazelnuts, potato flour, grated apple, grated lemon peel and the baking powder until just combined. Gently fold in the eggs white, bit by bit, into the batter until well combined and pour batter into the greased and lined baking tin.
  3. Bake in a medium oven at 350ºF for about 40 minutes or until the cake is deep golden brown on top and a skewer inserted in the middle of the cake comes out clean.
  4. When cool enough to handle, remove cake from tin and slice in half lengthways. Spread the bottom layer with blueberries jam and replace the top layer. Just before serving, dust with powdered sugar.
Share this Recipe
Continue Reading

Chocolate Christmas Tree

Chocolate Christmas Tree
Yum
Print Recipe
Recipe by Silvia Baldini— We make this yummy Nutella tree every year for the holidays. It's super easy delicious and it looks stunning. The kids make stars out of the left over puff pastry to decorate the plate. It's a great dessert to bring to your next Christmas party.
Servings Prep Time
6/8 people 20 minutes
Cook Time
12-15 minutes
Servings Prep Time
6/8 people 20 minutes
Cook Time
12-15 minutes
Ingredients
  • 2 sheets frozen puff pastry defrosted.
  • 1 cup nutella
  • 1 large egg
Servings: people
Instructions
  1. Preheat oven to 375 degrees F. Line a baking sheet with parchment paper. Roll out one puff pastry sheet into a large rectangle on a lightly floured surface and place on the prepared baking sheet.
  2. Lightly score puff pastry into the shape of a Christmas tree (triangle) with a wide base. Spread the Nutella over the triangle in a thin layer with the back of a spoon.
  3. Roll out the second sheet of puff pastry to a large rectangle and place on top of the first one. Carefully trace the shape of the chocolate covered triangle underneath and cut out the Christmas tree shape and the trunk. Pull away excess pastry.
  4. Lightly score 2 lines down the middle of the triangle to form a tree trunk that is narrower at the top and gets wider towards the base. Using the trunk as a guide, cut branches into the sides of the triangle.
  5. Twist the branches away from you, trying to get in 2 turns on the lower branches. Continue moving up the tree, twisting away from you as you go. Beat the egg in a bowl with a teaspoon of water and brush the tree with the egg wash.
  6. Bake in the preheated oven until puffy and golden brown, 12 to 15 minutes. Cool slightly, about 5 minutes. Slide onto a serving plate, using a piece of parchment paper if needed.
Recipe Notes

You can substitute the Nutella with  jam or peanut butter. You can make a savory version with grated cheese and ham.

Share this Recipe
Continue Reading

No Butter Coffee and Nutella Cake

No Butter Coffee and Nutella Cake
Yum
Print Recipe
Recipe by Silvia Baldini — This coffee and Nutella cake is another soft, no butter bundt cake. There is a secret to keep the center gooey and chocolatey. Simply bake half of the cake batter for 12 minutes and then add the Nutella. Cover with the remaining batter and finish to bake. YUM! A heart of Nutella!
Servings Prep Time
10/12 people 15 minutes
Cook Time
35-40 minutes
Servings Prep Time
10/12 people 15 minutes
Cook Time
35-40 minutes
Ingredients
  • 1 single espresso shot
  • 2 teaspoons instant coffee powder
  • 4 large eggs
  • 1 1/4 cup granulated sugar 220 g
  • 3/4 cup whole milk 180 ml
  • 1 teaspoon pure vanilla extract
  • 3/4 cup sunflower oil 80 ml
  • 2 1/4 cups pastry flour or 00 flour, sifted 280 g
  • 2 teaspoons baking powder
  • 1/4 teaspoon salt
  • 8 tablespoons nutella 250 g
  • powder sugar or cocoa powder for decorating
Servings: people
Instructions
  1. Preheat the oven at 350 degrees F. Grease the bottoms and the sides of a 9 inches round tube cake pan. Line with parchment paper. You can use a bundt cake but I would select a simple design or the cake will stick to the pan. A spring form pan works as well.
  2. Make one espresso shot and add the two teaspoons of instant coffee to it. Mix and set aside.
  3. In a stand in mixer, fitted with a wire whisk attachment, cream the eggs with the sugar until light and fluffy. About 10 minutes.
  4. Slow down the whisk and add the milk a little bit at the time until mixed in, then add the vanilla extract, the coffee and then slowly add the sunflower oil and then the flour, the baking powder and the salt. Keep mixing until well combined scraping down after each addition.
  5. Pour half of the cake batter in the prepared pan and spread with a knife or a silicon spatula. Bake for 12 minutes in the preheated oven. Take the cake out of the oven and spoon the Nutella on the half baked batter in a concentric circle. Cover with the remaining cake batter.
  6. Put back in the hot oven for another 25 to 27 minutes, until golden and firm. Use a toothpick to test the cake to see if it is cooked in the center.
  7. Remove the cake and place on a wire rack to cool. Do not remove the cake from the pan until cooled. Sprinkle with powder sugar before serving or with sifted cocoa powder.
Share this Recipe
Continue Reading

Yogurt and Strawberry Cake

Yogurt and Strawberry Cake
Yum
Print Recipe
Recipe by Silvia Baldini — One more super soft, moist and easy to make breakfast cake. Strawberry, yogurt, no butter- 15 minute to mix- 35 minute in the oven.
Servings Prep Time
10/12 people 15 minutes
Cook Time
35-40 minutes
Servings Prep Time
10/12 people 15 minutes
Cook Time
35-40 minutes
Ingredients
  • 3 large eggs
  • 1 cup granulated sugar
  • 5 oz plain yogurt
  • 1 teaspoon pure vanilla extract
  • 1 medium lemon peel grated
  • 2/3 cup sunflower oil you can also use grapes seeds or vegetable oil
  • 2 1/4 cups all-purpose flour, sifted
  • 1 1/2 teaspoons baking powder
  • 1/4 teaspoon salt
  • 1 1/4 cup fresh strawberries, quartered
  • powder sugar
Servings: people
Instructions
  1. Preheat the oven at 350 degrees F. Grease the bottoms and the sides of a 9 inches round tube cake pan. Line with parchment paper. You can use a bundt cake but I would select a simple design or the cake will stick to the pan. A spring form pan works as well.
  2. In a stand in mixer, fitted with a wire whisk attachment, cream the eggs with the sugar until light and fluffy. About 10 minutes.
  3. Slow down the whisk and add the yogurt a little bit at the time until mixed in, then add the vanilla extract, the grated lemon peel, slowly add the sunflower oil and then the flour, the baking powder and the salt. Keep mixing until well combined scraping down after each addition.
  4. Pour half of the cake batter in the prepared pan and spread with a knife or a silicon spatula. Spread the half of the strawberries on top of the batter, then cover with the remaining cake batter. Place the remaining strawberries on top of the batter.
  5. Put in the hot oven for 35 to 40 minutes, until golden and firm. After 20 minute in the oven you can quickly add some strawberries to the top of the cake, without taking the cake out of the oven, then finish baking. Use a toothpick to test the cake to see if it is cooked in the center.
  6. Remove the cake and place on a wire rack to cool. Do not remove the cake from the pan until cooled. I cover the cake while it's cooling with plastic wrap for moisture. Sprinkle with powder sugar before serving.
Recipe Notes

Bake for 25 minutes and add extra strawberries to the top then finish to bake.

Share this Recipe
Continue Reading

Mixed Berry Jam Bundt Cake

Mixed Berry Jam Bundt Cake
Yum
Print Recipe
Recipe By Silvia Baldini—No butter but super soft, with a hint of lemon and packed with the last berries of the season. Power snack, italian style!
Servings Prep Time
10/12 people 15 minutes
Cook Time
40-45 minutes
Servings Prep Time
10/12 people 15 minutes
Cook Time
40-45 minutes
Ingredients
  • 3 large eggs
  • 3/4 cup granulated sugar
  • 1 1/4 cup fresh ricotta, drained
  • 1 teaspoon pure vanilla extract
  • 1/2 medium lemon peel grated
  • 1/3 cup sunflower oil you can also use grapes seeds or vegetable oil
  • 2 cups all-purpose flour, sifted
  • 1/2 teaspoon baking powder
  • 1/4 teaspoon salt
  • 8 ounces mixed berry jam you can use fresh berries
  • powder sugar to decorate
Servings: people
Instructions
  1. Preheat the oven at 350 degrees F. Grease the bottoms and the sides of a 9 inches round tube cake pan. Line with parchment paper. You can use a bundt cake but I would select a simple design or the cake will stick to the pan. A spring form pan works as well.
  2. In a stand in mixer, fitted with a wire whisk attachment, cream the eggs with the sugar until light and fluffy. About 10 minutes.
  3. Slow down the whisk and add the fresh drained ricotta a little bit at the time until mixed in, then add the vanilla extract, the grated lemon peel, slowly add the sunflower oil and then the flour, the baking powder and the salt. Keep mixing until well combined scraping down after each addition.
  4. Pour half of the cake batter in the prepared pan and spread with a knife or a silicon spatula. Spread the jam or the fresh berries on top of the batter, then cover with the remaining cake batter.
  5. Put in the hot oven for 40-45 minutes, until golden and firm. Use a toothpick to test the cake. Remove and place on a wire rack to cool. Do not remove the cake from the pan until cooled. I cover the cake while it's cooling with plastic wrap for moisture.
  6. Once cooled, invert the cake on a serving plate, peel the paper off, invert again and sprinkle with powder sugar before serving.
Share this Recipe
Continue Reading

Boston Cream Cake

This Boston Cream cake is my son Augusto’s favorite cake. Every September we leaf together through all my recipes and my cooking books in search of the perfect birthday cake. Every year we come back to this custardy and chocolaty three layer wander. The soft sponge cake layers are sandwiched and kept in place with a smooth and silky vanilla custard and then topped with an intense and bittersweet chocolate ganache, the kind that drips gracefully down the sides. The cake looks impressive and it might look hard to make but it’s actually very simple — if you get organized and follow the directions step by step. I make the sponge layers and the custard they day before the birthday; then I assemble the cake on a pretty stand and make the ganache an hour or two before I need  to serve it. My son helps measuring and he is in charge of bowl and spoons licking, he is efficient and quick.


Boston Cream Cake
Yum
Print Recipe
Servings Prep Time
16/18 people 40 minutes
Cook Time Passive Time
25/35 minutes 2 hours minimum
Servings Prep Time
16/18 people 40 minutes
Cook Time Passive Time
25/35 minutes 2 hours minimum
Boston Cream Cake
Yum
Print Recipe
Servings Prep Time
16/18 people 40 minutes
Cook Time Passive Time
25/35 minutes 2 hours minimum
Servings Prep Time
16/18 people 40 minutes
Cook Time Passive Time
25/35 minutes 2 hours minimum
Ingredients
Sponge Cake
  • 3 sticks butter unsalted room temperature and cut in to pieces
  • 3 cups granulated sugar
  • 6 large eggs room temperature
  • 1 1/2 teaspoon pure vanilla extract
  • 2 3/4 cups self rising flour
  • 1/4 cup corn flour
  • 2 teaspoons baking powder
  • 6 tablespoons whole milk lukewarm
Vanilla Custard
  • 2 tablespoons cornstarch
  • 2 cups whole milk
  • 6 large eggs yolks
  • 3/4 cups granulated sugar
  • 2 teaspoons vanilla extract
Chocolate Ganache
  • 1/4 cup heavy cream
  • 2 tablespoons light corn syrup
  • 1 cup semi sweet chocolate in small pieces about 6 ounces
Servings: people
Instructions
Sponge Cake
  1. Preheat the oven to 350F. Butter and line three 9 inches cake pans with parchment paper. Put all the ingredients except the milk in a bowl of a standing mixer fitted with a blade. Beat until you get a smooth batter and then slowly add the milk a little bit at the time. You can be a purist and beat cream the butter and sugar first and then add the eggs one at time, the vanilla and then the flour, corn flour and baking powder one spoon at the time then the milk; but honestly, for this kind of sponge, it doesn't make much of difference.
  2. Pour the batter in the prepared cake pans and level with a knife. Bake in the hot oven for 25 minutes or until golden brown, the cakes come away from the pans sides and the sponge is springy to the touch.
  3. Leave the cakes to cool in the pans on a rack for 10 minutes, then gently turn them and leave them on the racks to cool completely. Once they have cooled I wrap them in plastic wrap and store them in the fridge until ready to plate.
Vanilla Custard
  1. Combine the corn starch and 1/4 cup of the milk in a non reactive medium bowl. Whisk in the eggs yolks Set aside.
  2. In a stainless steel medium saucepan combine the remaining 3/4 cups milk and the sugar, the vanilla extract and bring to a boil then simmer unit the sugar is all dissolved.
  3. Ladle one third of the sweet milk on to the egg mixture in a thin stream, whisking constantly. Gradually whisk the egg mixture in to the remaining hot milk in the pan. Whisking constantly bring to a boil then reduce the heat and boil very gently for a minute until thick and smooth.
  4. Transfer the custard in a metal bowl, cover with plastic wrap to prevent a skin to form. Refrigerate to chill and keep cold until ready to use. If the custard curdle, don't panic, you can strain it through a thin mech strainer or blend it.
Chocolate Ganache
  1. In a small heavy pan saucepan, combine the cream and the corn syrup. Bring to a simmer over low heat and stir to blend. Remove from the heat, add the chocolate, let is stand for a minute or two then whisk well until smooth and shiny.
Recipe Notes

You can freeze the sponge cakes up to 3 months.

Share this Recipe
Continue Reading

7 Yogurt Containers Yellow Cake

The 7 yogurt containers cake. Always a smashing succes. You don’t need a scale or measuring cups because you use a small yogurt cointaner, a single portion 125ml, to measure all the ingredients.  Probiotics and immune system boosters make this soft, heavenly vanilla scented confection, low in sugar and with no butter, a piece de resistance for a rainy afternoon baking project. See those yellow, tall, crumbly slices disappear.


7 yogurt containers yellow cake
Yum
Print Recipe
Servings Prep Time
8 to 10 slices 25 minutes
Cook Time
45 minutes
Servings Prep Time
8 to 10 slices 25 minutes
Cook Time
45 minutes
7 yogurt containers yellow cake
Yum
Print Recipe
Servings Prep Time
8 to 10 slices 25 minutes
Cook Time
45 minutes
Servings Prep Time
8 to 10 slices 25 minutes
Cook Time
45 minutes
Ingredients
  • 1 125-ml container plain or vanilla nonfat yogurt
  • 2 containers granulated sugar
  • 3 large eggs room temperature
  • 1 container mild olive oil plus more for the pan
  • 1 tbsp pure vanilla extract
  • 1 container potato starch
  • 2 containers all-purpose flour 00 flour is also a good choice
  • 1 tsp baking powder
  • 1/2 tsp salt
Servings: slices
Instructions
  1. Preheat the oven to 350°F. Oil a 9-inch round springform cake pan and line it with parchment paper cut to fit the pan.
  2. Place the yogurt in the bowl of a stand mixer, add the sugar and beat until creamy and smooth.
  3. Separate the eggs and place the yolks and whites in separate bowls. Set the egg whites aside for the moment. Add the egg yolks to the yogurt mixture, 1 at a time, mixing until each yolk is incorporated before adding the next. With the motor running, slowly add the oil and the vanilla extract.
  4. With the motor on low, slowly add the potato starch and mix until incorporated. Then add the flour, baking powder and salt and mix well.
  5. Whisk the whites until firm peaks form. Using a rubber spatula, gently and slowly fold the eggs whites into the batter by hand and mix just until incorporated. Gently pour the batter into the prepared cake pan.
  6. Bake the cake for 45 minutes, or until golden brown. You may need to cover the cake with parchment paper during the last 10 minutes to prevent the top from burning.
  7. Place the pan on a wire rack and let cool for 10 minutes. Unmold the cake and let it cool completely.
Recipe Notes

I like to dust this soft cake with a generous amount of powder sugar. Those times when I want a slightly less sweet cake, I modify the recipe by cutting the granulated sugar in the batter to one container.

Share this Recipe
Continue Reading

Vanilla Pound Cake

Pound cake derives its name from the original formula from which it was made: one pound of butter, sugar, flour and eggs. Enough to make two loaves. This old-fashioned recipe from my grandma calls for approximately a half pound of each  ingredient and yields one loaf. Feel free to double the recipe. Share or freeze one of the loaves or just eat both of them. No judgement!

Vanilla Pound Cake
Yum
Print Recipe
Servings Prep Time
1 9x5 inch loaf 30 minutes
Cook Time
75 minutes
Servings Prep Time
1 9x5 inch loaf 30 minutes
Cook Time
75 minutes
Vanilla Pound Cake
Yum
Print Recipe
Servings Prep Time
1 9x5 inch loaf 30 minutes
Cook Time
75 minutes
Servings Prep Time
1 9x5 inch loaf 30 minutes
Cook Time
75 minutes
Ingredients
  • 2 cups all-purpose flour
  • 1/2 tsp baking powder
  • 1/2 tsp salt
  • 1 cup unsalted butter, plus more for the pan 2 sticks
  • 1 cup granulated sugar
  • 5 large eggs room temperature
  • 2 tsp pure vanilla extract
Servings: 9x5 inch loaf
Instructions
  1. Preheat the oven to 325°F. Butter a 9-by-5-by-3-inch loaf pan.
  2. In a medium bowl, stir together the flour, baking powder and salt.
  3. In a standing mixer bowl, beat the butter until fluffy. Gradually beat in the sugar until blended. Beat in the eggs, 1 at the time, and then add the vanilla. Add the dry ingredients and beat until smooth.
  4. Scrape the batter into the loaf pan and bake until the top peaks and turns golden brown, about 1 hour and 15 minutes. When the cake is done, it will spring back when gently touched and a toothpick inserted in the center comes out clean.
  5. Cool the pound cake in the pan on a wire rack for 10 minutes and then turn the loaf out onto the rack to cool throughly. Slice and serve.
Recipe Notes

Sometimes I like to add the grated zest from an organic lemon for a citrusy burst of flavor or a handful of chocolate chips for extra happiness.

Share this Recipe
Continue Reading

Banana Bread with Bourbon Raisins and Pecans

This banana bread is one of the most delicious I have ever had. The recipe is absolutely easy to make and you don’t even need machinery. A couple of old-fashioned large bowls and a wooden spoon will do the trick. It’s also an excellent reason to make good use all those blackened bananas forgotten on the counter. I have adapted the recipe from a Nigella version, and I cut the sugar and butter quantities for a lighter version. This banana bread is adored by my two kids; don’t worry about the alcohol from the bourbon. I use it to soak the raisins and it cooks away. You can also substitute the bourbon with orange juice or apple juice.

Banana Bread with Bourbon Raisins and Walnuts
Yum
Print Recipe
Servings Prep Time
8/10 slices 15 minutes
Cook Time Passive Time
1 to 1 1/2 hour hour 1/2 hour
Servings Prep Time
8/10 slices 15 minutes
Cook Time Passive Time
1 to 1 1/2 hour hour 1/2 hour
Banana Bread with Bourbon Raisins and Walnuts
Yum
Print Recipe
Servings Prep Time
8/10 slices 15 minutes
Cook Time Passive Time
1 to 1 1/2 hour hour 1/2 hour
Servings Prep Time
8/10 slices 15 minutes
Cook Time Passive Time
1 to 1 1/2 hour hour 1/2 hour
Ingredients
  • 3/4 cup raisins
  • 1/4 cup bourbon or dark rum (orange or apple juice can be substituted)
  • 1 -1/4 cup all porpoise flour
  • 2 tsp baking powder
  • 1/2 tsp baking soda
  • 1/2 tsp salt
  • 1 stick butter melted
  • 1 cup sugar
  • 2 large eggs
  • 4 to 6 small very ripe bananas, mashed (the blacker the better)
  • 4 tbsp chopped pecans
  • 1 tsp pure vanilla extract
Servings: slices
Instructions
  1. Line a 9x5 loaf pan with parchment paper and preheat the oven to 325°F.
  2. Put the raisins and bourbon or rum in a small saucepan and bring to a boil. Then remove from the heat, cover and let it soak until the raisins have absorbed most of the liquid, at 1/2 least hour or so. (You can do this step overnight.)
  3. Put the flour, baking powder, baking soda and salt in a medium bowl and combine well with a wooden spoon.
  4. In a large bowl, mix the melted butter and sugar and beat until blended.
  5. Beat the eggs into the butter and sugar mixture, 1 at a time, and then beat in the mashed bananas.
  6. Using a wooden spoon, stir in the chopped pecans, soaked raisins and vanilla extract.
  7. Now add in the flour mixture, about 1/3 at a time, stirring well after each addition.
  8. Scrape the mixture into the prepared loaf pan and bake in the middle of the oven for 1 to 1 and 1/4 hours. When it’s ready, a toothpick or fine skewer inserted in the center should come out fairly clean.
  9. Let the banana bread cool in the pan on a wire rack.
Recipe Notes

A little grated fresh ginger and some chopped macadamia nuts would make a great addition. Chopped dried apricots, figs or dates are marvelous substitutions for the raisins.

Share this Recipe
Continue Reading